
Overview
This guide will help you to setup WHMCS to auto-install scripts during user account creation. Setting this up is very easy. This guide assumes that you have already installed Softaculous on your server.
Note: This works only with Webuzo, cPanel, cPanel Extended, DirectAdmin, Plesk, Interworx, VestaCP, ISPmanager and CWP at the moment.
List of Scripts
All the scripts in Softaculous can be Auto Installed. Following is the popular list of scripts :
WordPress, Joomla, Drupal, phpBB, SMF, Gallery, Magento, osTicket, CodeIgniter, Moodle, Elgg.
(See the first pic to see where you have to add the names of scripts, the box outlined in red is where you add the list of scripts.)
Download and Upload
Download the Auto Installation Hook here File:Autoinstall.zip
Unzip it and upload the file called softaculous.php, in your /path/to/whmcs/includes/hooks/ Directory. If you want to debug for any errors or test the Auto Install is working properly please also upload the softaculous_debug.php file in your /path/to/whmcs/includes/hooks/ Directory. You can remove the softaculous_debug.php file later after it works successfully.
If you want to add Auto Installation for Custom Scripts then please modify softaculous_extra.php and upload it as well. Otherwise you dont need to upload softaculous_extra.php
Editing a Product/Service
Now login to your WHMCS Admin Panel. This guide assumes you have already setup WHMCS to create user accounts automatically. If you have not already setup your server you can find detailed guides on the WHMCS Docs
Setup Custom Fields
Go to Setup -> Products/Services and click on the Edit Product Icon of the Product you wish to setup Auto Installation for.

In the Edit Product section, click the ‘Custom Fields’ tab. In the Custom Fields tab > Add New Custom Field.
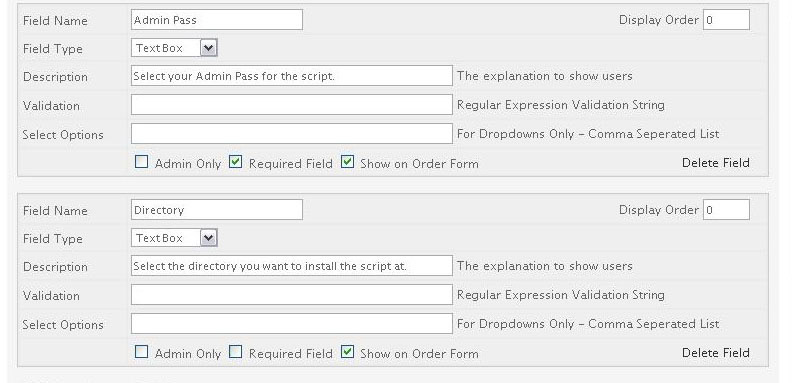
We will have to add 4 Custom Fields.
You can only add 1 Custom Field at a time, so after adding the first field hit the ‘Save Changes’ button, for the 2nd field to show up.
This is how we add custom fields.
See the images below for the 4 custom fields.
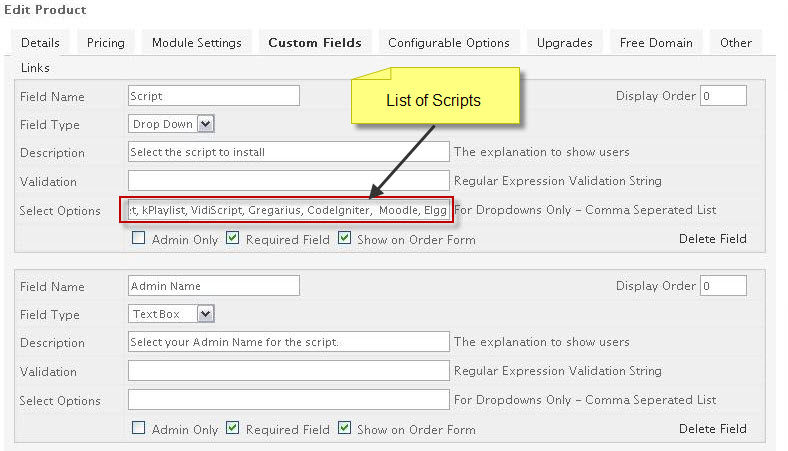
Note : You can give “None” as the first option in the List of Scripts. If users dont want to install a script when their account is created, they can choose “None” to refrain from installing any script.
Very Important Note : Fill in the fields name as per the image only. IF you wish to modify the Field Names (e.g. “Admin Username” instead of “Admin Name”) then you must upload the softaculous_extra.php file as well (it has sample code to modify the field names).
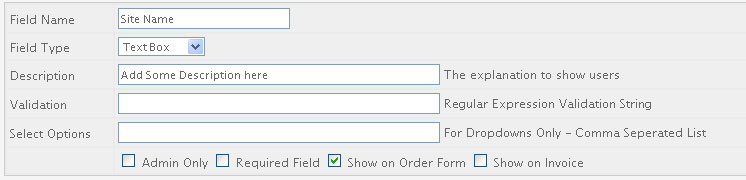
Additional Custom Fields
You can also setup additional Fields for optional parameters like “Site Name”, “Site Description”, etc. Continue adding the Fields that you wish similarly as you did above.
You need to make one more change in the softaculous_extra.php
You need to create an Array $GLOBALS[‘softaculous_conf’][‘custom_fields’] add the number of fields you want to add in this array the key of the array will be the name of the field in the install.xml file of the script.
For Eg: If you want to add the Site Name field for WordPress
1. Go to /var/softaculous/wp/install.xml
2. Search for the site name field, you will get the following code:<input type="text" name="site_name" size="30" value="My Blog">
</input>
3. The key for $GLOBALS[‘softaculous_conf’][‘custom_fields’] will be the name of the input tag i.e. site_name
4. The value for $GLOBALS[‘softaculous_conf’][‘custom_fields’] will be the Custom Field name that you provided in the WHMCS product setup in this case Site Name.
5. The additional field is now setup.
Setup Module Run Time
The Softaculous Hook will run and try to Auto Install the script only when the account is being created. This option can be found while editing the Product/Service in Module Settings Tab. You can choose any of the option in the image shown below. Just remember that Softaculous will create the account only as per the method you select.
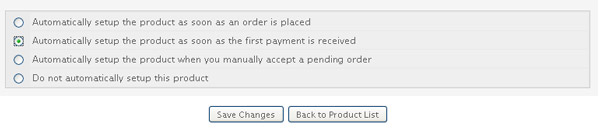
Once you are done with the 4 fields, hit the Save Changes button and you are done.
Testing the Setup
You can test the setup by making a DUMMY Order and going to the settings of that order.
For debugging purposes upload softaculous_debug.php in the /path/to/whmcs/includes/hooks/ Directory. If you dont upload the softaculous_debug.php no error messages will be shown.

Creating Account
Make sure the Admin Name and Admin Pass are setup and the desired script is selected e.g. WordPress
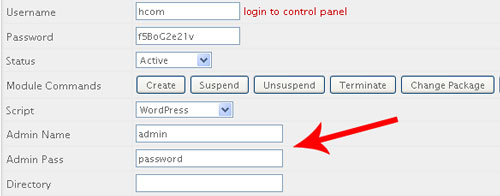
Then click on the Create button to create the account on the server.
You will see a Box shown in the following image
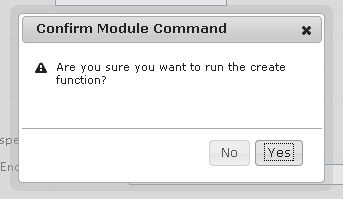
Success Message
When the page reloads (assuming debugging is enabled) the following message will be shown in case of success :

Error Message
Incase of Failure errors will be shown (assuming debugging is enabled).

There could be several reasons for the Hook Not to work :
- A firewall is blocking requests
- You put the incorrect Field Names
- cURL is disabled in PHP
- etc.
Remove Debug File
Please remove the softaculous_debug.php file after you have successfully setup the Module.
Custom Scripts
If you have made a Custom Script in Softaculous and want to enable Auto Installation of that script via WHMCS then please upload the file softaculous_extra.php as well in the hooks folder.
Before uploading the softaculous_extra.php file, please modify it and add the scripts to the $add_softaculous_scripts array for the script you want to automate installation.
Please note that the ID of the custom script must be the same as that of the Custom Script in Softaculous Admin Panel.
Install WordPress Plugins/Themes Set
If you need to install a particular set of plugins/themes along with WordPress you can add the Plugins/Themes Set from Softaculous admin panel referring to the following guide and then configure the below line in softaculous_extra.php
$GLOBALS['softaculous_conf']['defaults']['sets_name'][] = 'ecommerce_admin';
In the above example the set name is “ecommerce” and “_admin” is the suffix required to tell Softaculous that this set is created by admin and exists in the admin panel.
Random Username/Password
If you need a Random string for username or the password, you can just delete the field “Admin User” or “Admin Pass” from WHMCS admin panel -> Setup -> Products/Services -> Custom Fields. And if the values for username or password are not passed while creating the Module Softaculous will generate random string of 12 characters with atleast one Uppercase character, one Special character and one Integer.
The details for the same will be sent via email to the user.
Custom Length for Random Password
If you need the set a custom length for Random string for admin password to make the password stronger, you can specify the length in softaculous_extra.php
$GLOBALS['softaculous_conf']['rand_pass_length'] = 15;
Overwrite Files
If you get an error that the files already exists and you wish to overwrite the files just change the value of the following variable in softaculous_extra.php to 1
$GLOBALS['softaculous_conf']['overwrite_existing'] = 1;
This will now overwrite the existing files and complete the script installation without any errors.
USER MOD DIR
- If you wish to install the script using User Mod dir i.e. install a script on http://IP/~USER/ instead of domain.
- Just change the value of the following variable to 1 in the softaculous_extra.php
$GLOBALS['softaculous_conf']['user_mod_dir'] = 0;
TO
$GLOBALS['softaculous_conf']['user_mod_dir'] = 1;
Note : In order to use this feature, the Use User Mod Dir option should be enabled from the Softaculous Admin panel on the server.
Specify script to Install
- If you do not want the user to choose the script to install, instead you want to specify the script to be installed.
- Just add the following code to the softaculous_extra.php
$GLOBALS['softaculous_conf']['custom_fields']['Script'] = 'WordPress';
- You can provide the script of any script. You can find the script name in the /path/to/softaculous/enduser/scripts.php.
- Thats it! Now when the user account is created WordPress will be installed. You can also delete the Custom field Script (which we created above).
Specify specific script to Install for specific WHMCS products
- If you have multiple products and want to install different scripts for different WHMCS products without having the user to choose the script, you can specify the same using the variables explained below.
$GLOBALS['softaculous_conf']['install']['pid'][1] = 'WordPress'; // 1 is the PID and WordPress is the script we want to install
$GLOBALS['softaculous_conf']['install']['pid'][2] = 'Joomla'; // 2 is the PID and Joomla is the script we want to install
- In the above example we installed WordPress for any orders created for the WHMCS product (with PID 1) and Joomla for any orders created for the WHMCS product (with PID 2).
Specify default values for Custom Fields
- If you want to specify the default values for custom fields like Admin username or Directory, etc, just add the following code to the softaculous_extra.php
$GLOBALS['softaculous_conf']['defaults']['admin_username'] = 'admin';
$GLOBALS['softaculous_conf']['defaults']['softdirectory'] = 'test';
- Similarly you can set the default values for any other custom field.
- Thats it! Now when the user account is created the Admin Username will be admin and the script will be installed in test directory. You can also delete the Custom fields Admin Name and Directory (which we created above).
Specify default values for Custom Fields by Product IDs
- If you want to specify the default values by Product IDs for custom fields like Admin username or Directory, etc, just add the following code to the softaculous_extra.php
$GLOBALS['softaculous_conf']['defaults_by_pid'][1]['admin_username'] = 'admin';
$GLOBALS['softaculous_conf']['defaults_by_pid'][1]['softdirectory'] = 'test';
- Similarly you can set the default values for any other custom field.
- Thats it! Now when the user account is created the Admin Username will be admin and the script will be installed in test directory for the Product ID 1. You can also delete the Custom fields Admin Name and Directory (which we created above).
Specify WHMCS Product IDs
- You can specify the product ids for which you want the module to be executed, just add the following code to the softaculous_extra.php
$GLOBALS['softaculous_conf']['pid'] = array(1, 2);
- Note : the above value should be an array and if you want the hook to be executed for just one product you can pass it as follows :
$GLOBALS['softaculous_conf']['pid'] = array(1);
Email Installation Password in Plain Text
- If you choose to generate the admin password randomly you might want to email that password to the user in plain text. In order to do that please set the following variable in softaculous_extra.php
- Note : This setting will apply only for the installation done via WHMCS. Any installation done by user from Softaculous enduser panel later will use the default password masking setting as set in Softaculous admin or enduser panel.
$GLOBALS['softaculous_conf']['defaults']['email_password'] = 1; // Set this to 1 if you wish to send the installation password in plain text
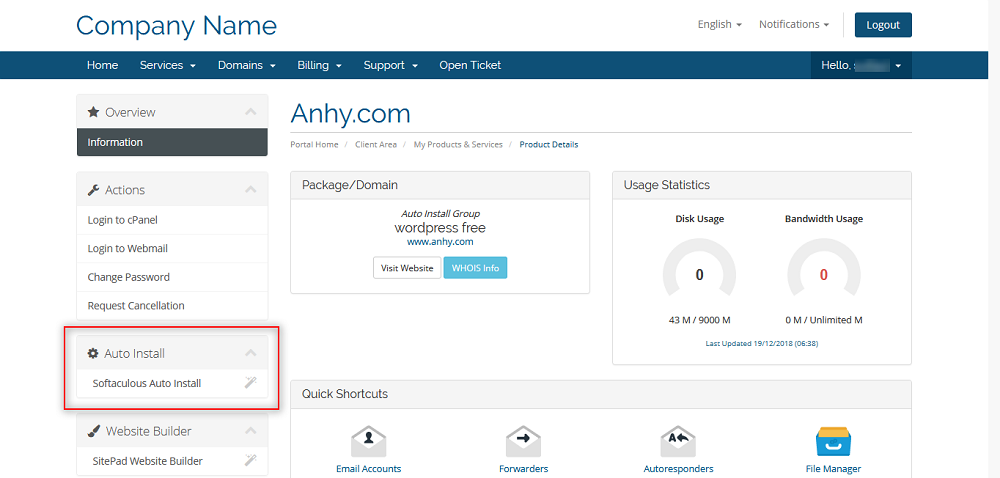
Enable Softaculous sidebar link in clientarea
- You can enable Softaculous link at the left sidebar of the WHMCS client area, just add the following code to the softaculous_extra.php
$GLOBALS['softaculous_conf']['softaculous_sidebar_link'] = 1; // //Set this to 1 if you wish to enable Softaculous link in client area sidebar.
- Thats it! Now you will be able to see the Softaculous link
Debug
If the module is not working and you would like debug, please upload the softaculous_debug.php to the /path/to/whmcs/includes/hooks/ directory and then test the module.
This will Log the error message in WHMCS admin panel -> Utilities -> Logs -> Activity Logs
Support
If you need any assistance then please contact Softaculous Support. Please send us a screenshot of the Order Form and the Custom Fields you added to the Product.
Vote
If you find this addon useful please vote for us :
https://www.whmcs.com/members/communityaddons.php?action=viewmod&id=1038