
Overview
This page will help you in importing your installations from some other server to Softaculous on your server using remote. (For eg. If you want to import a WordPress Installation installed on any other server to Softaculous on your server.)
If you have a local installation and want to import the same on the same server just so to update the records in Softaculous you may follow the guide here: https://www.softaculous.com/docs/How_to_Import_an_Installation
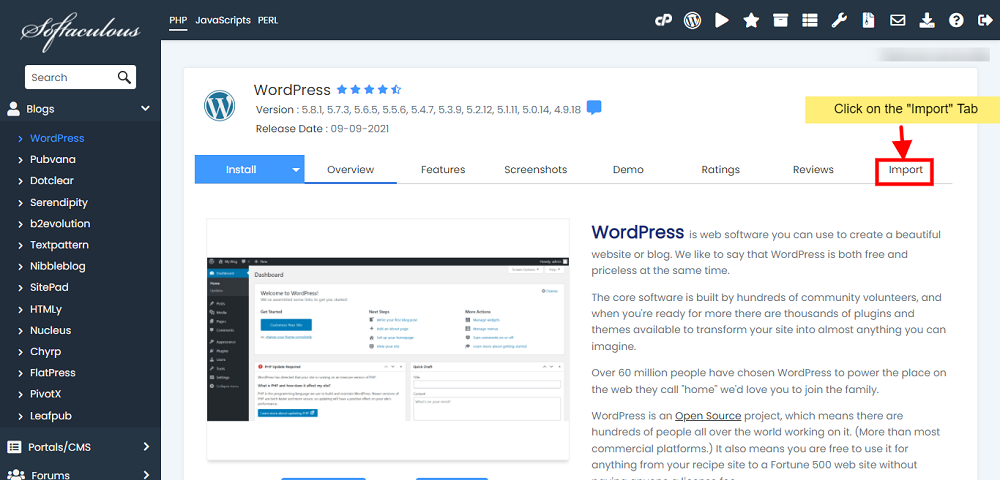
1) First click on the Import Tab on the Software page in Softaculous Enduser panel.
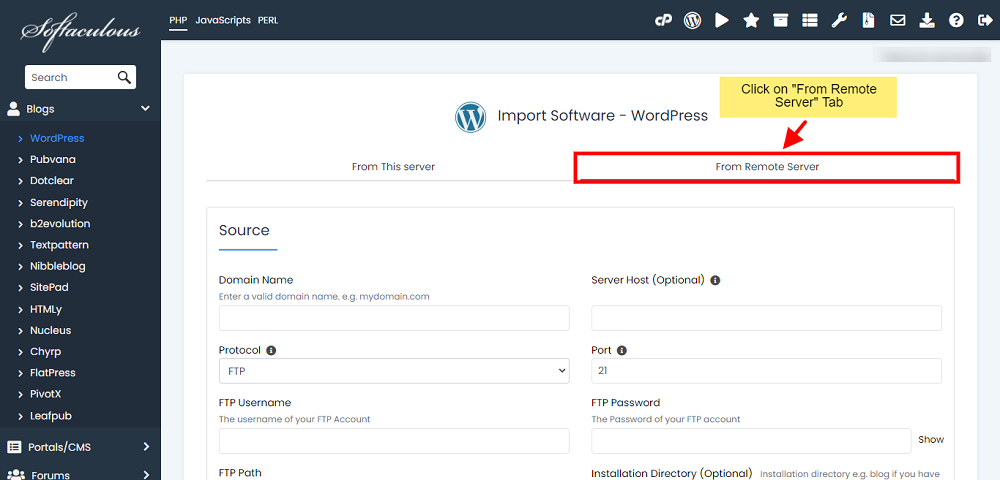
2) Then go to From Remote Server Tab on the Import page.
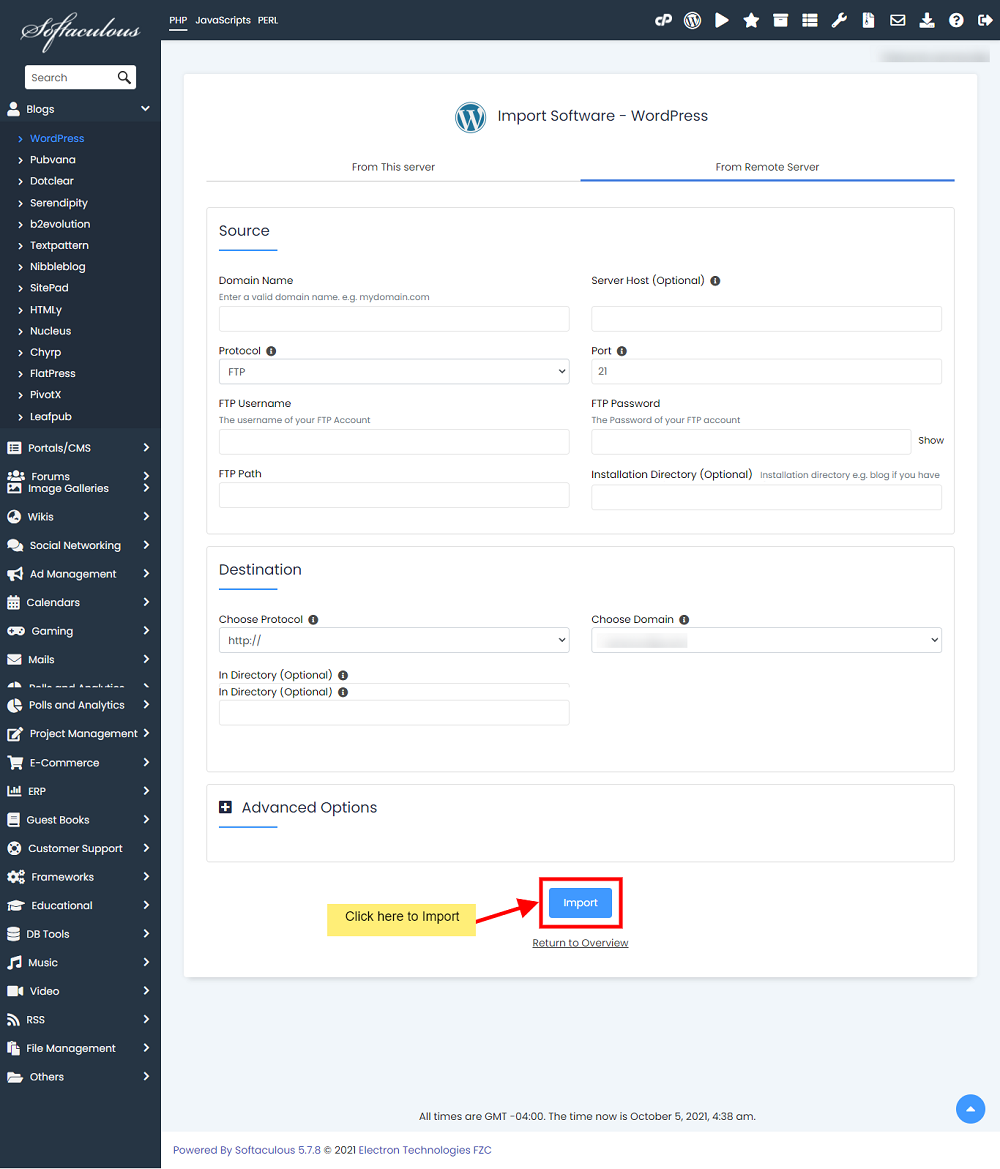
3) Fill in the domain and FTP details of the Source Installation and details like protocol, domain name, directory, database name, etc for the Destination Installation and click on Import button.
Detailed explanation for the fields :
Source Details
1. Domain Name : This is the domain name from where the installation is to be imported from. Example : mydomain.com
Please Note : The domain name should not contain http:// or https://
2. Server Host (Optional) : This is an optional field. You can specify the server host if your domain name is not the same as your server host. Example : ftp.mydomain.com
Generally the server host is the same as domain name so you can leave this blank.
3. Protocol : Choose the protocol that you would like to use. This depends on what protocol is supported with your login details.
Default is FTP
4. Port : This is the Port to use while connecting to the domain. The default port for FTP is 21
5. FTP Username : This is the username that you use to connect to your server. If you are using cPanel enter your cPanel username here.
6. FTP Password : This is the password for the FTP user that you provided above to connect to your server. If you are using cPanel enter your cPanel password here.
7. FTP Path : This is the relative path to web accessible directory of your domain i.e. the path after you login to your domain with the details you provided above.
Examples :
- When you login with your FTP details if you see public_html or htdocs or www directory then your FTP Path will be /public_html or /htdocs or /wwwrespectively.
- When you login with your FTP details if you directly land in the web root of your domain then your FTP Path will be /
- If you are using an addon domain or sub domain please provide the path to your addon domain or sub domain respectively.
8. Installation Directory (Optional) : This is the directory name where the installation to be imported is present. Example : wp856
Please Note : Keep this field blank if the installation is made in /public_html directory.
Destination Details
1. Choose Protocol : Choose the protocol that is supported by your server where the installation is to be imported.
2. Choose Domain : This is the domain name where the installation is to be imported to. Example : destinationdomain.com
3. In Directory (Optional) : Specify the directory name where you want the installation to be imported to. Example : wpdest
Please Note : Keep this field blank if you want your installation to be imported to /public_html directory.
4. Database Name : Specify the Database name where you want the database of the source installation to be imported to.
4) The import process will carry on in the background once you click on the Import button. You will receive the Emails regarding the initiation of the import process and the final status of the same.

5) You can view the import progress of the installation by visiting the Task List tab as shown here:
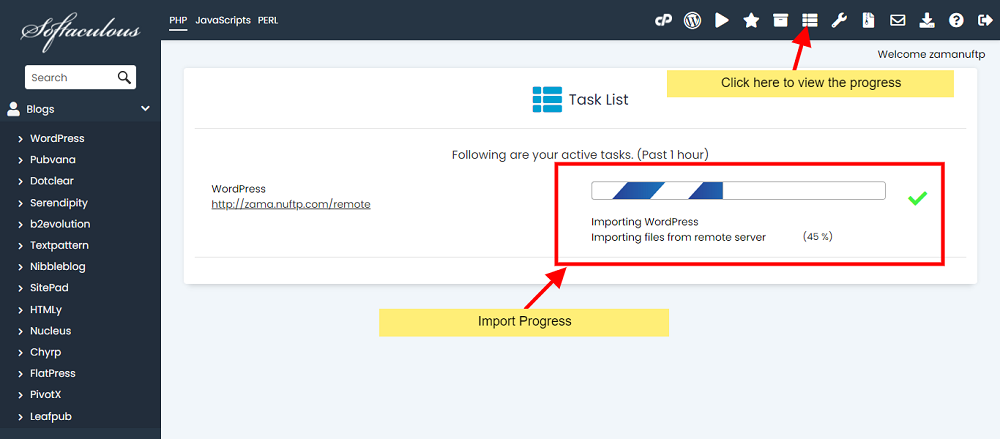
6) You can manage the imported installation once the progress reaches 100% and the message Import Completed appear.