
Edit Installation Details
This page will help you to edit an installation of a script. (for eg. To edit an installation of WordPress just follow the steps given below)
1) Click on the Edit Icon.
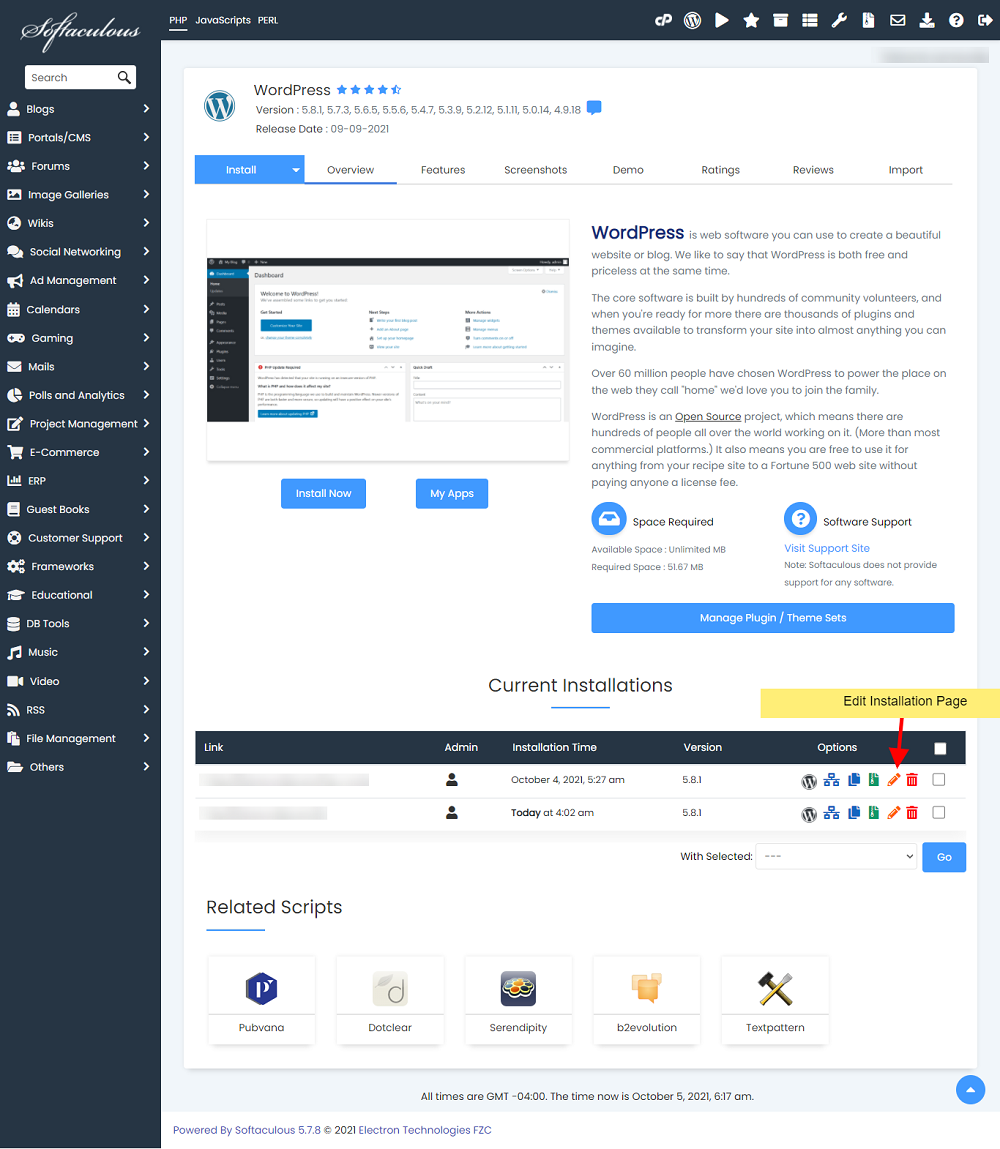
2) After clicking on the Edit Icon you will be redirected to the page where you can edit the installation.
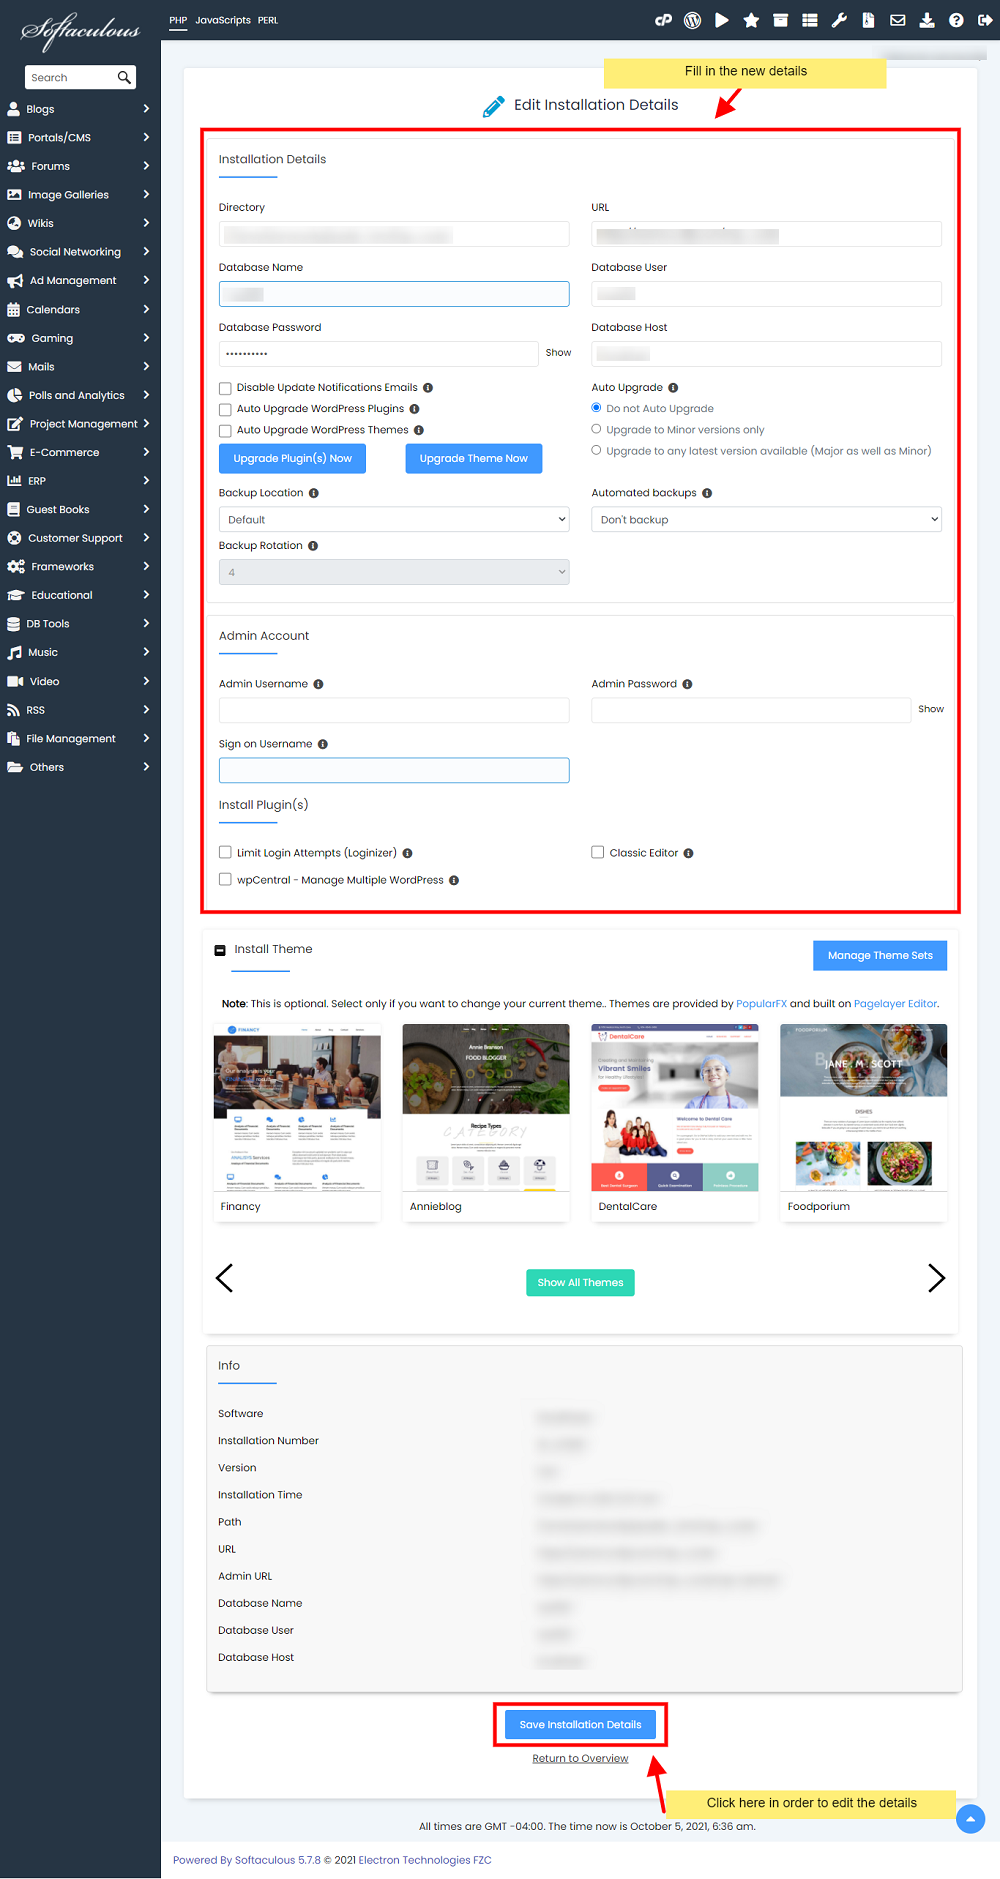
3) Fill in the new details.
4) Now click on the Edit Installation button to edit the installation details.
Reset Admin Password
In order to reset the admin password for the installation, you can do so from Softaculous Edit Installation Page.
On the Edit Installation Page, you will find the section Admin Account as shown here:
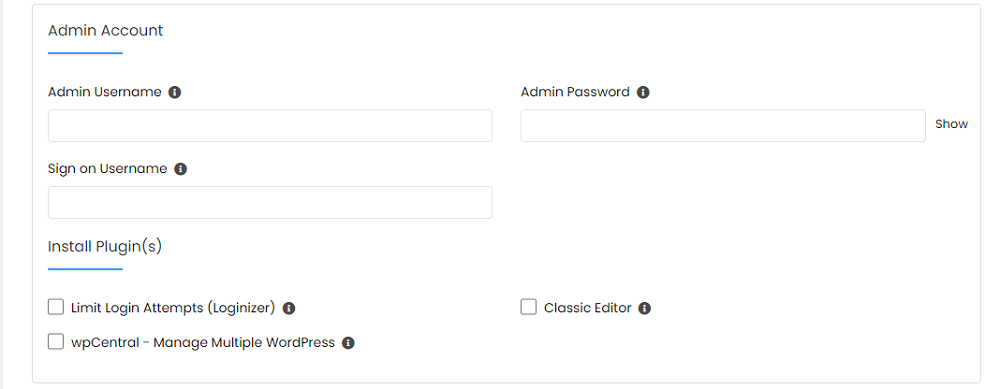
Enter the admin username for which you want to reset the password and enter the new password. Now save by clicking on the Edit Installation button at the bottom of the page.
Your admin password is now changed and you can access your installation’s admin panel using the newly set password.
Upgrade Active Plugin(s)/Theme(s) Now
If you want to Upgrade the Active Plugin(s) and Theme(s) of your installation, you can do so from the Edit Installation page.
1) On the Edit Installation Page, you will find the buttons Upgrade Plugin(s) Now and Upgrade Theme(s) Now besides the options Auto Upgrade Plugins and Auto Upgrade Themes as shown here:
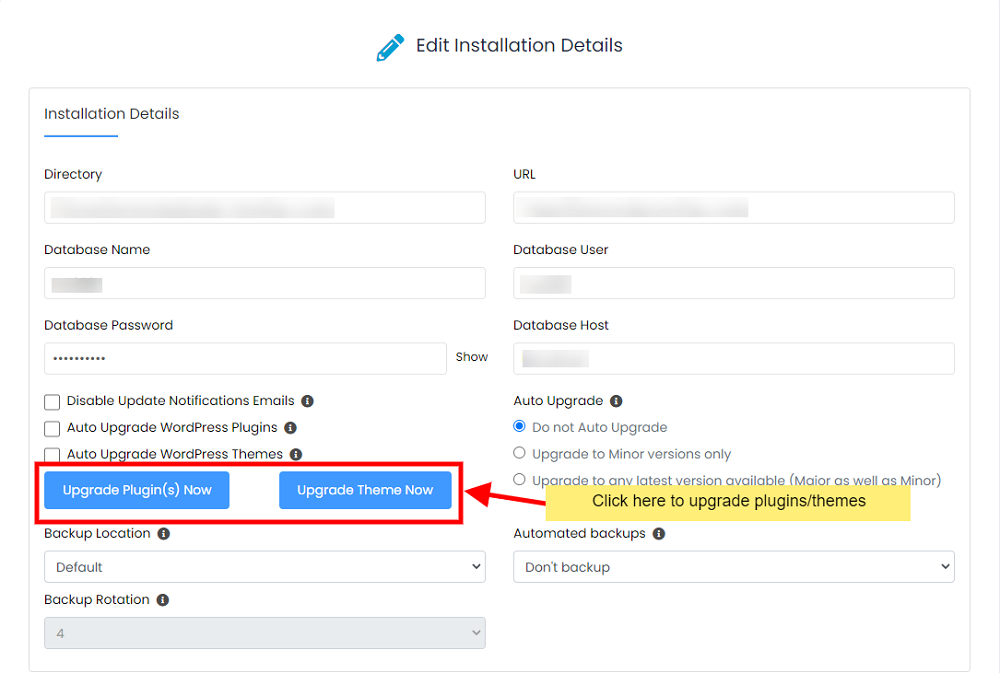
2) Click on these buttons and all the outdated active plugins and themes for the installation will be upgraded to their latest version.
Custom CRON Time for Auto Backup
You can set a custom CRON time while setting the auto backup for the installation.
1) On the Edit Installation Page, you will find the option Backups as shown below.
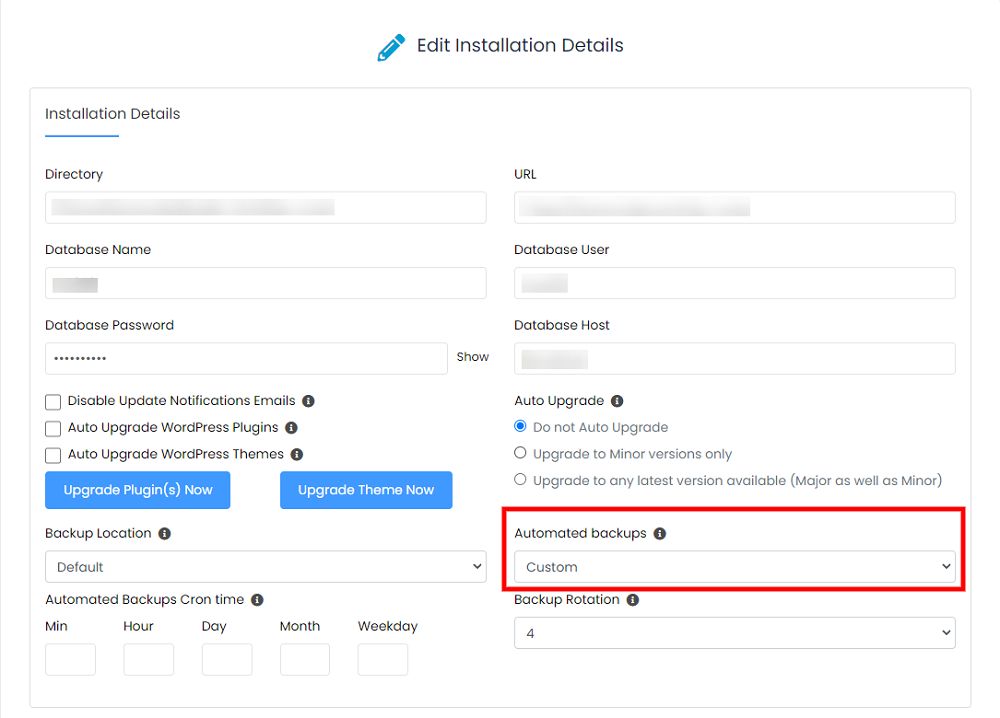
2) Select the option Custom option from the Automated Backups dropdown.
3) Fields to set Automated Backups CRON Time will be displayed.
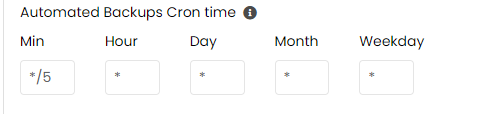
4) Enter the Min, Hour, Day, Month, Weekday values in the fields to set the CRON timings.
5) Now click on the Edit Installation button at the bottom of the page to save the changes.
Custom CRON Time for the auto backup is now saved and now your auto backups will be performed at the time you specified.
Select a Backup Location
1) On the Edit Installation Page, you will find the Backup Location option as shown here:
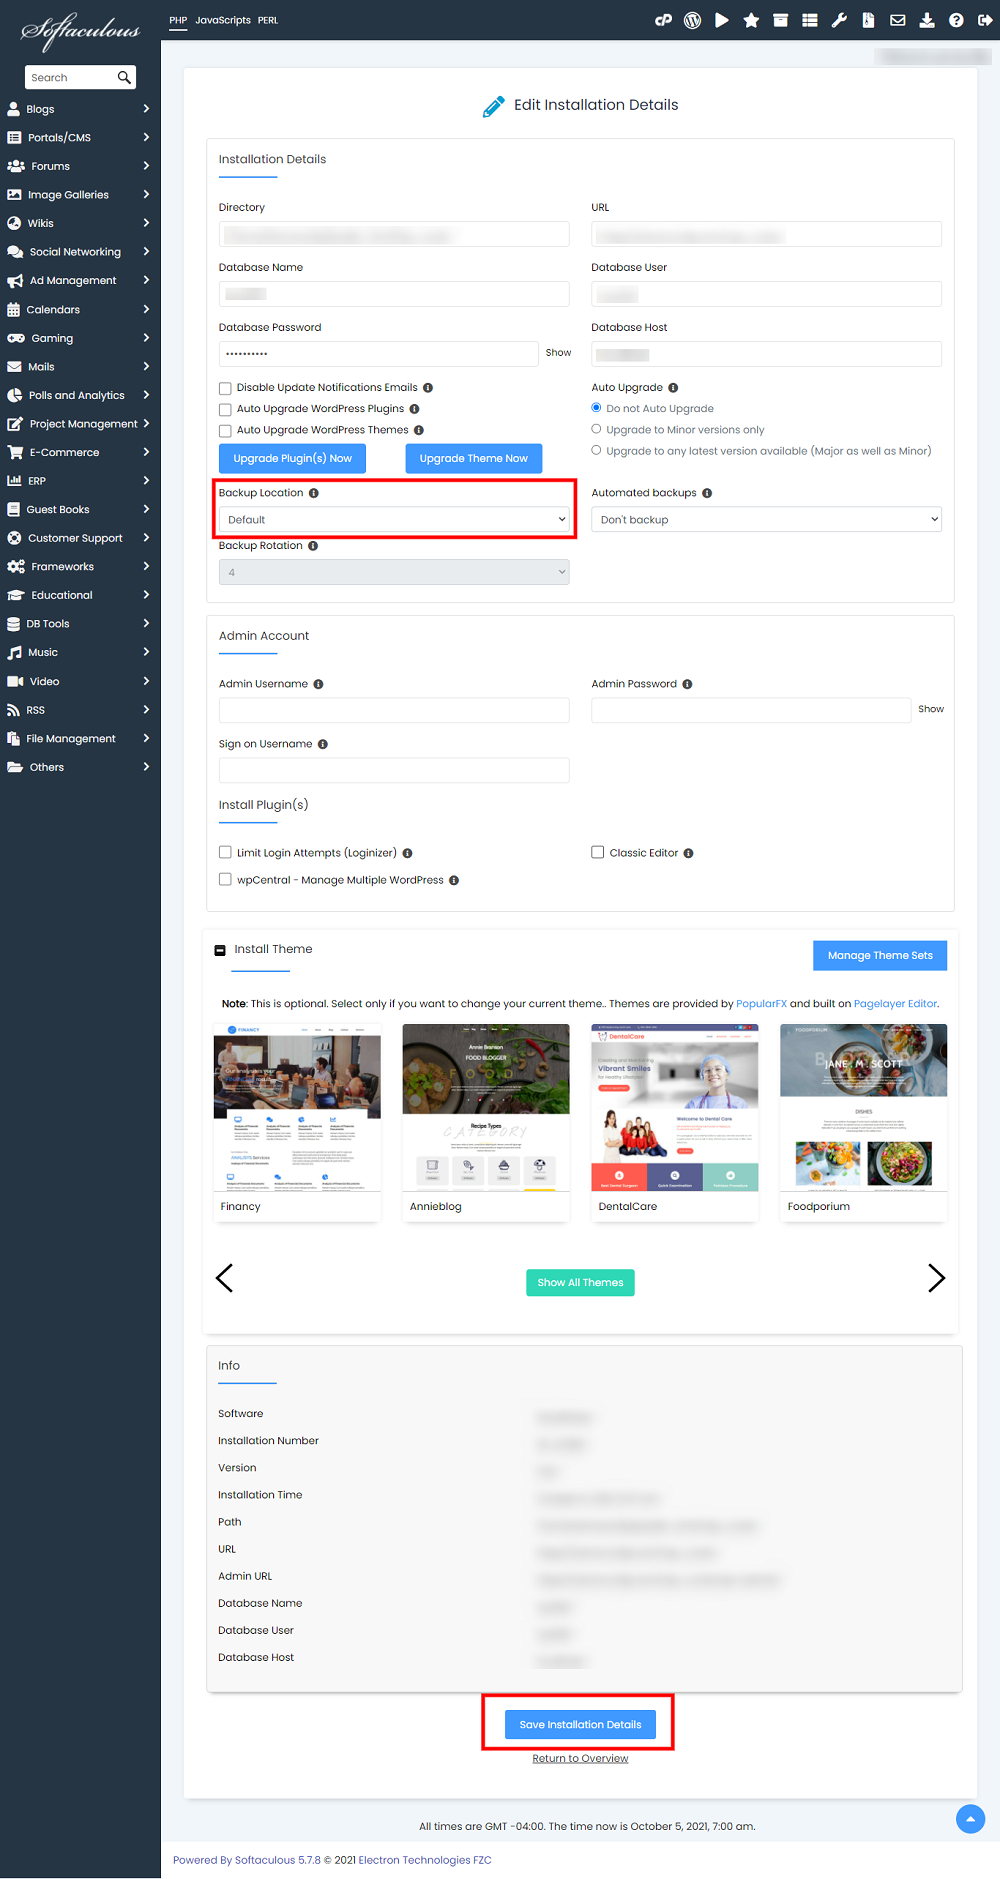
2) Select the backup location from the values given in the dropdown.
3) Once selected, click on the Edit Installation button at the bottom of the page to save the changes.
Now you can take a backup of this installation from Create Backup page. Your backups will be stored at the Backup Location you have set.C